
The ember table
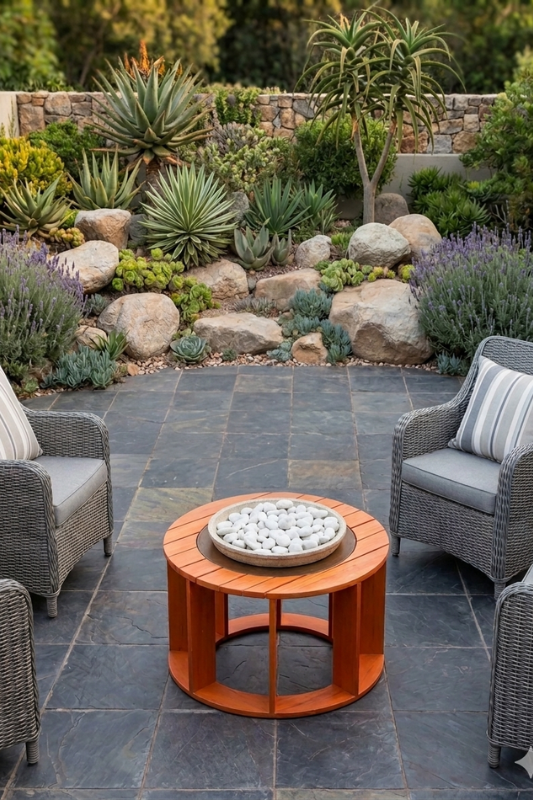
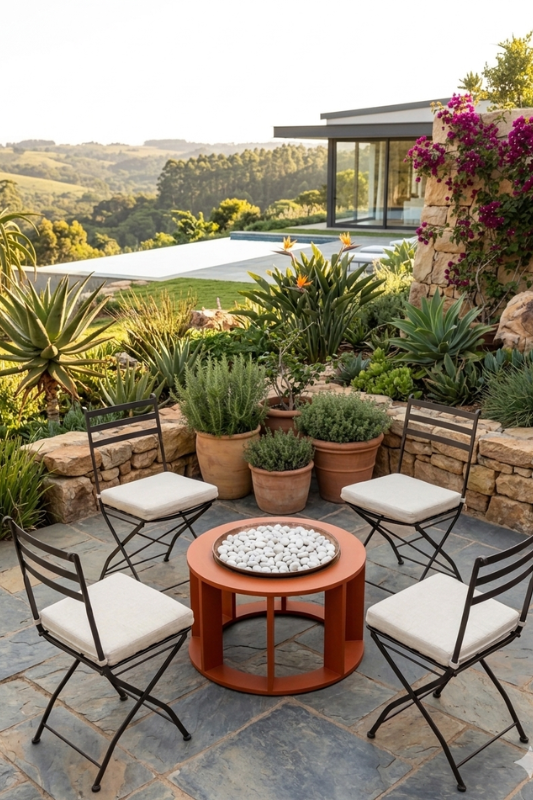
Looking for a way to make your outdoor space more comfortable during cooler evenings? This clever DIY project combines practicality with style, creating a coffee table that also works as a heat source.
The design uses a glass top with a hidden heating element made from ceramic briquettes and ethanol fuel. The result is a functional, eye-catching centrepiece that keeps your patio warm while you entertain.
Materials Needed:
Make sure you have all your materials prepared before starting your build. Accurate measurements are essential for a sturdy and well-finished result.
- 2 @ 840 x 840 x 20 mm wooden boards
- 8 @ 442 x 140 x 20 mm wooden uprights
- 8 mm glass cut in a circle, diameter 718 mm
- 8 wooden joining biscuits
- pine gauge sticks, to mark circles
- 1-litre Woodoc 10 Interior
- Polywax Sealer (Velvet)
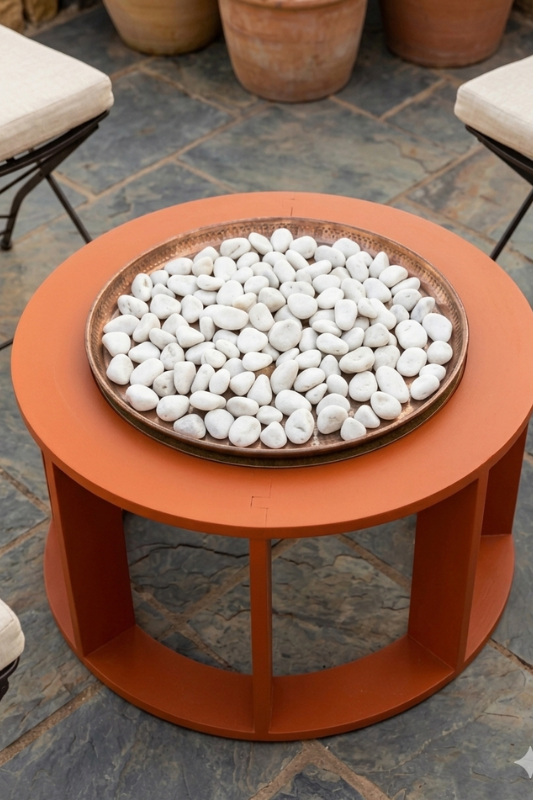
- Terracotta pot base (diameter 50 cm)
- Weber 47 cm standard cooking grid
- 80 Cadac ceramic briquettes
- 5 empty, cleaned tuna tins
- ethanol-based odourless bio-fuel
Tools
- biscuit joiner
- jigsaw
- electric drill
- screwdriver
- planer
- sander
- 4 x carpenter’s sash clamps
- paintbrush
Steps
Step 1: Using the gauge stick, draw identical circles on both boards; the outer circles should have a diameter of 840 mm and the inner circles, 720 mm.

Step 2: On both boards, mark exactly where the 8 uprights will be positioned, equal distances from each other. Use the biscuit joiner to cut a neat groove into the centre of each of these marks for the biscuits that will join the uprights to the tabletop.

Step 3: Use the jigsaw to cut out the circular forms from the two boards. The circle with the grooves forms the top of the table and the other forms the base

Step 4: Cut a recess 120 mm x 12 mm into one sideof each upright. These recesses will serve as the supports for the glass top. Chamfer the uprights to a width of 120 mm.

Step 5: Attach the recessed side of the uprights to the underside of the top circle, using the biscuits and wood glue.

Step 6: Attach the base to the other ends of the uprights, using screws and glue. Use the carpenter’s sash clamps to clamp the top and base together until the glue has dried.

Step 7: Sand and seal the table: apply three coats of sealer, sanding lightly between coats
Step 8: Position the glass in the centre of the table and place the terracotta pot base on it. Place five metal containers in the pot base and fill each with ±100 ml bio-fuel.
Step 9: Arrange the ceramic briquettes on the grid, light the bio-fuel, and rest the grid on the tins. The fuel heats the briquettes, and when the fuel is spent the briquettes continue to give off heat.
Looking for something?
Follow Us


